
My full thought process about my full CG sequence from my reel
In this post, I will share my thought process and how I approached creating the sequence from Secret Level: Warhammer 40K
First of all, my main purpose was not to create the same shot. I added different shots and used different colours consciously.
-Analyse-
Since I had the reference sequence, I downloaded it as a video and extracted every frame. Then, using Nuke, I was able to study the original footage frame by frame. This allowed me to understand how the sequence was built, how the camera movements behaved, and what kind of visual decisions were made throughout the shot.
While doing this, I also noticed some small mistakes, such as bullet traces passing through the character’s body :D Of course, when the sequence plays at normal speed, these details are not really noticeable.
Seeing these issues also helped me understand the kinds of technical and visual problems I might face during my own project.
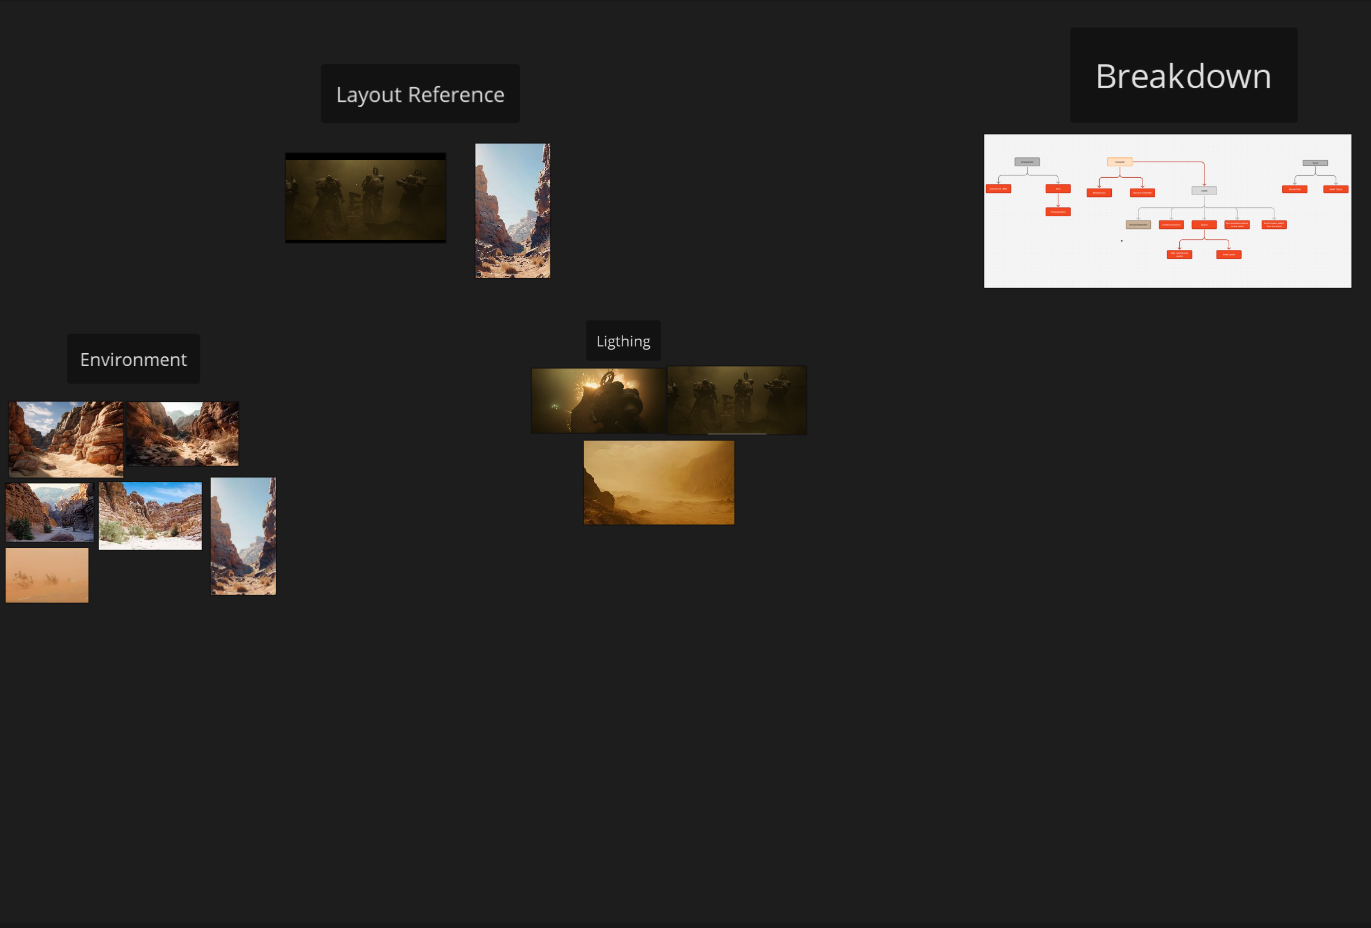
I've also used PureRef to compile other references to get more information about the landscape lighting. So in this process, I was thinking about how my landscape and lighting should look. My purpose was to make it feel like a bleak and dusty atmosphere. Before this process, I actually made a breakdown of the scene.

While doing the breakdown, I was watching the sequence frame by frame and put my analysis on the chart. Some time after starting the project, I modified the breakdown and added and removed some concepts. But basically, I was constantly looking at my breakdown and going through each step one by one.
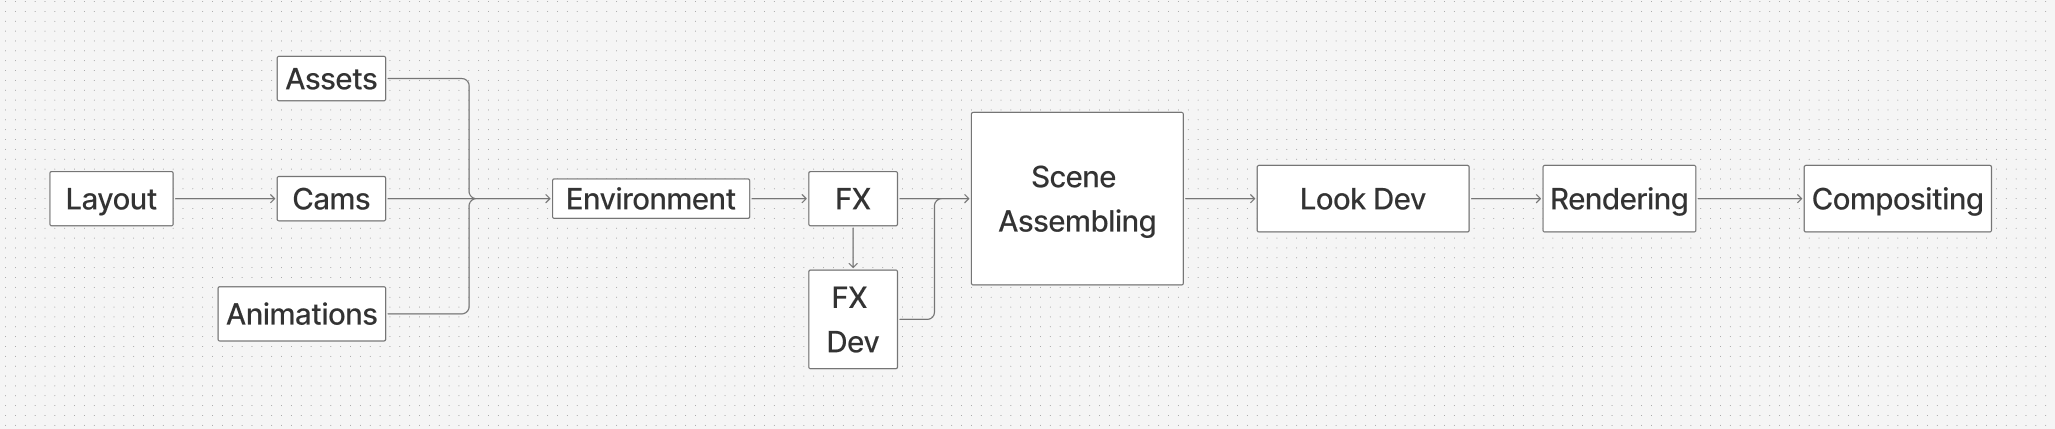
My Workflow was something like below
-Main Job-
After the analysis stage, I wanted to start with the more basic tasks, such as texturing the assets and making the necessary modifications.
Following that, I procedurally built the main hero ground plane and animated the cameras. After this stage, I focused on rigging both the vehicle and the character. For the vehicle rig, I used my own custom HDA and hand-animated every piece directly inside Houdini. When it came to the character animation, I first tried to hand-animate it myself. I spent around three days trying to get a decent result, but honestly, it looked awful :D So I decided to use AI motion capture. At first, I did not expect it to give me a usable result, but the output was actually okay. After that, I retargeted the skeleton to my main character rig inside Houdini.
Once the animations were done, I was ready to start creating the FX elements for the scene. I wanted to begin with relatively simple simulations, such as the cloth simulation inside the vehicle. However, before jumping directly into the final simulation, I spent a fair amount of time on FX development. For example, with the cloth sim, I first used a basic grid plane and experimented with the Vellum parameters to understand how each setting affected the geometry. I also took notes on the parameters during this process.
Once I achieved the behaviour I was looking for, I shifted my focus back to the main hero shot. Working this way allowed me to break the project into smaller pieces, test ideas more freely, and learn much faster. I basically applied the same mindset to the other effects as well.
-USD SOLARIS-
Since these types of FX-heavy scenes are very expensive to handle, assembling and rendering everything in other DCCs like Maya or Blender was not really possible on my machine. This is where the USD workflow became extremely useful.
First, I organized all my FX elements into separate GEO nodes inside Houdini. Then, I exported each of them as USD files or USD sequences and stitched them together when needed. By referencing the data from disk instead of keeping everything live in the scene, I was able to greatly improve viewport performance. Another advantage was Solaris being node-based. It allowed me to freely prune unnecessary elements outside the camera perspective and keep the scene much lighter.
Because of this workflow, I managed to render all my shots with almost zero crashes or technical problems.
-Shot finishing-
I don't want to talk about the compositing part too much. Basically, I rendered multiple different passes and layers. To have much more control over my layers, I rendered some FX shots separately, but they were baked in camera, of course.